
Fine ceiling height Adjustment
Important Note
If you’ve completed the standard installation of your LWF60 attic ladder but later increased or decreased the floor thickness or noticed gaps between ladder sections, the following steps will help you readjust the ladder to ensure safety and proper alignment.
Open and Inspect
- Fully unfold the ladder.
-
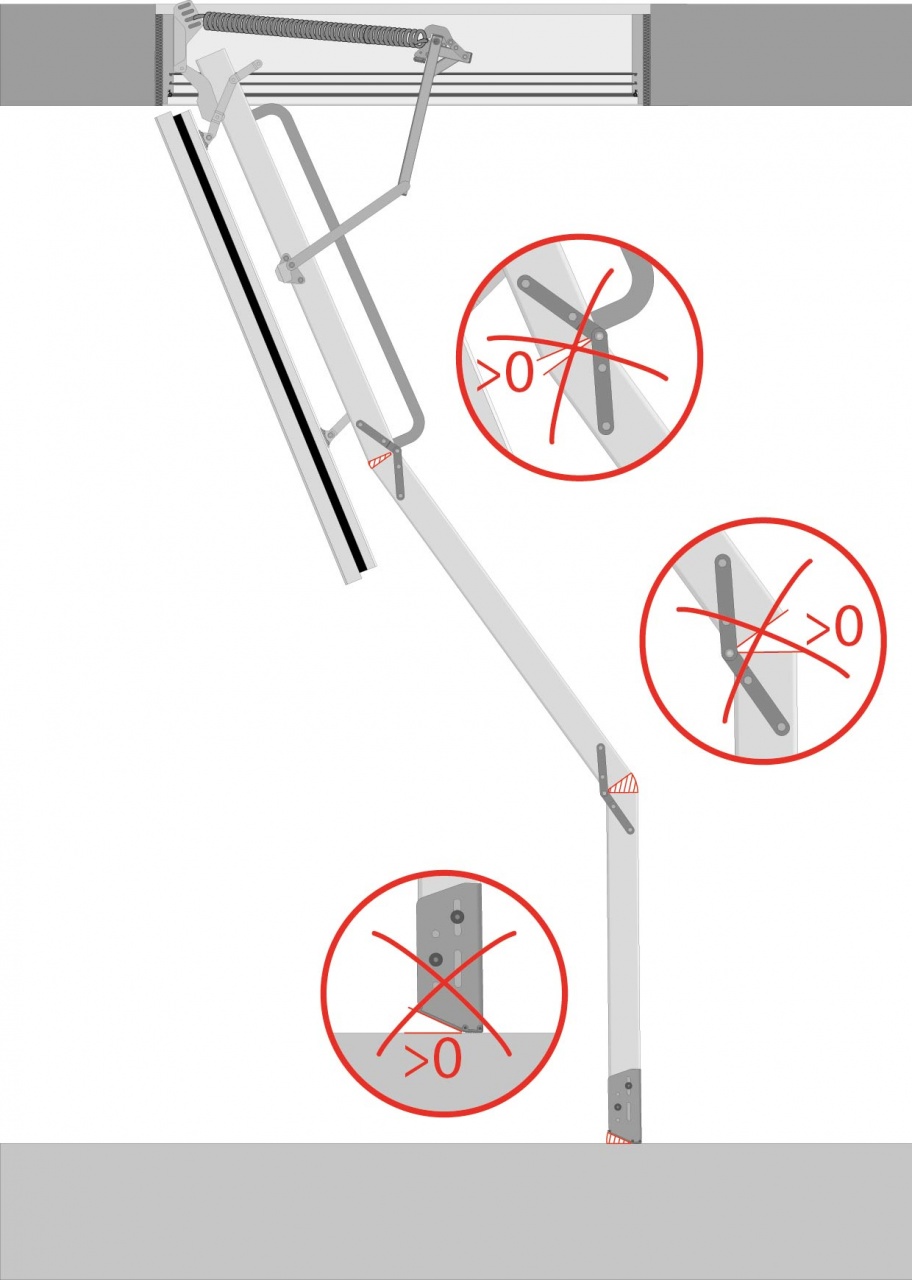
Check if there are no gaps between segments. Check images below:
I.Correct Installation

II.Ladder to short

III.Ladder to long
I.Correct Installation
II.Ladder to short
If the gap appears only between the middle and bottom ladder sections, and there is no gap between the top and middle one, follow the steps below.
Step 1 – Adjust the ladder arms
Try adjusting the ladder by tightening the bolts located near the arms. These bolts are positioned on both sides of the box and may be slightly loose. Use a ½" wrench to tighten them gradually and equally on both sides until the gap between the middle and bottom sections disappears.
Make sure there is no gap between the top and middle sections during this process — this indicates correct ladder positioning.

If the bolts are fully tightened and the gap is still present, reinstall the feet — but only if your ladder includes adjustable feet. Use the appropriate instructions:
• LXS-W instructions – for wooden ladders
• LXS-M instructions – for metal ladders
If your ladder does not include adjustable feet and the standard adjustment doesn't help, please contact us using this form, and we’ll be happy to assist.
⚠️ Do not extend the feet beyond the maximum adjustment range specified in the installation manual.
Extending the feet beyond this limit may compromise ladder stability and pose a safety risk.
III.Ladder to long
If your ladder appears too long, there will always be a visible gap between the top and middle ladder sections. In some cases, an additional gap may also appear between the middle and bottom sections.
Step 1 – Adjust the ladder arms
Try loosening the bolts located near the arms. These bolts are positioned on both sides of the box and can be loosened up to a maximum of ⅜" (as shown in the image below). Use a ½" (13 mm) wrench and adjust both sides evenly.

Step 2 – Trim the ladder or adjust the feet
If the bolt adjustment is not sufficient to eliminate the gaps:
-
If your ladder is equipped with LXS plastic feet (non-adjustable), skip the adjustment and trim the bottom section of the ladder according to the installation manual for your specific model.
-
If your ladder is equipped with LXS-M adjustable metal feet, proceed with the foot adjustment as described in the instructions.
Use the appropriate instructions:
• LXS-W instructions – for wooden ladders
• LXS-M instructions – for metal ladders
If these steps do not resolve the issue, please contact us using this form, and we’ll assist you directly.
⚠️ Do not trim the ladder below the minimum ceiling height specified in the ladder installation manual.
The bottom section of the ladder must always include at least two steps to ensure safe and stable operation.


